How to Assemble a DIY Electric Radiator with a Heating Element: Step-by-Step Guide

- What you'll need for assembly
- Materials
- Tools
- Step-by-step assembly instructions
- Step 1. Installing the heating element in the control unit housing
- Step 2. Installing the unit into the radiator
- Step 3. Filling the coolant
- Step 4. Connection and first startup
- Step 5. Setting the temperature
- Table: common faults after assembly and their causes
- Practical experience: what to watch for after a DIY assembly
- Why following electrical safety rules matters
- Regular maintenance of the assembled radiator
- A ready-made solution instead of DIY assembly
- How many radiator sections you need and how it affects the result
- DIY versus factory-made: comparing costs and risks
- When DIY assembly makes sense, and when it's better to buy a ready-made solution
- Choosing a control unit: what to look for
- Practical watertightness check before continuous operation
- Using the assembled radiator as part of a heating system
- Electricity costs of an assembled electric radiator
- Common questions during the first startup
- When to call in a professional instead of assembling it yourself
- Checking the condition of an old radiator before conversion
- Sources and useful links
Quick answer: to assemble an electric radiator yourself, you need a bimetal radiator, a heating element (tubular heater) of the right wattage, a control unit with a thermostat, and a coolant (distilled water or propylene glycol). The heating element screws into the radiator's lower side opening through the control unit, the radiator is filled with coolant with no air pockets, and then the unit is connected to the mains. The whole process takes 1-2 hours if you have basic tool skills, but it requires strict adherence to electrical safety rules.
An electric radiator built from a regular bimetal radiator is a popular solution for standalone heating of a cottage, garage, or single room when central heating is unavailable or unreliable. Instead of water from a boiler, the coolant in the sections is heated by a built-in heating element with an electronic control unit. Let's go step by step through how to assemble such a unit yourself, what materials you'll need, and which mistakes to avoid.
What you'll need for assembly
Materials
- A bimetal radiator with the required number of sections (the number of sections affects heat capacity and, accordingly, how fast it cools after being switched off).
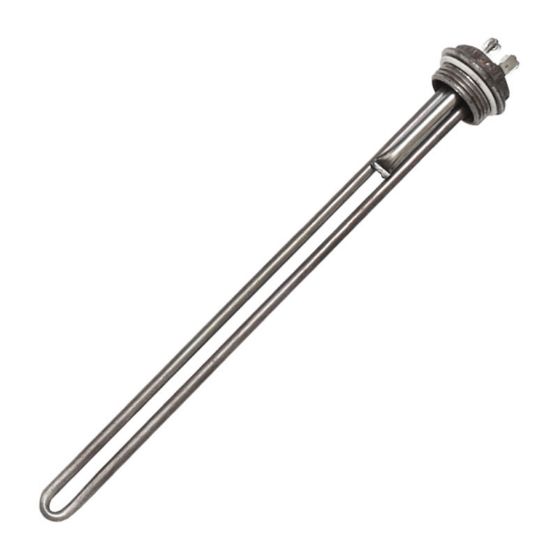
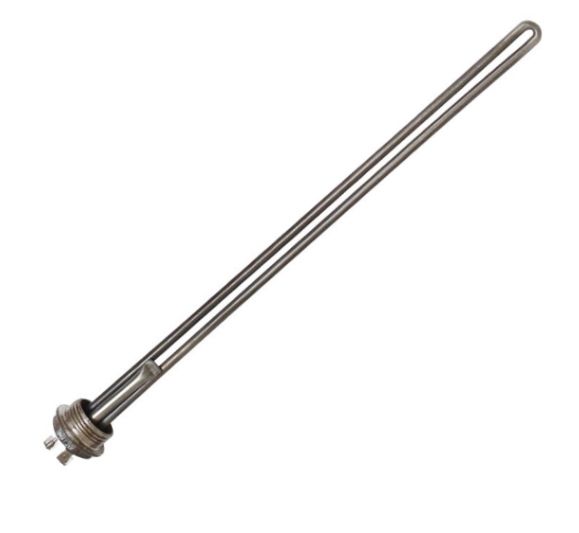
- A heating element (tubular heater) of the appropriate wattage for the radiator's volume.
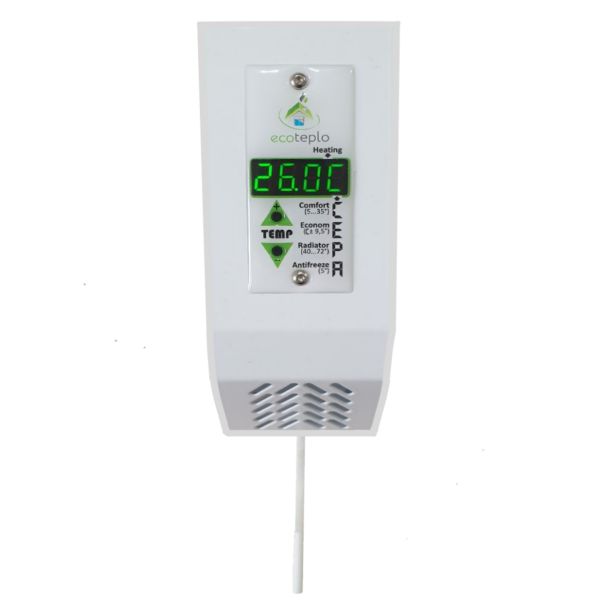
- A control unit with a thermostat and an overheat sensor — this is what's responsible for the safe and precise operation of the whole assembly.
- Coolant: distilled water or a special propylene glycol mix (don't use regular tap water — it contains salts that accelerate corrosion and scale buildup).
Tools
- A hex key or adjustable wrench.
- A container for pouring the coolant, a funnel.
Step-by-step assembly instructions
Step 1. Installing the heating element in the control unit housing
The heating element is inserted into the opening on the side of the control unit housing. Silicone gaskets from the kit are installed on both sides — they ensure the connection is watertight. The heating element is secured with an adjustable wrench or hex bit without excessive force, so as not to damage the threads.
Step 2. Installing the unit into the radiator
The assembled "heating element + control unit" is screwed into the radiator's lower side opening. The overheat sensor is installed into the heating element's internal opening, and it's important to check that the sensor's black wire is protected by a white heat-resistant sleeve along its entire length — without this protection, the wire can be damaged by heat.
Step 3. Filling the coolant
Coolant is poured into the radiator's top opening through a funnel. The key point is completely removing air pockets: if air remains in the system, the last section or the top part of the radiator will stay cold, and heat transfer along the whole radiator will be uneven. A silicone gasket from the kit is installed under the Maevsky valve (air vent valve).
Step 4. Connection and first startup
The Ecoteplo control unit is connected to the mains according to the manufacturer's instructions. For connecting a unit with a heating element up to 1 kW, use a copper cable with a cross-section of at least 2.5 mm² (PVS or VVG type), with a dedicated 16A circuit breaker and mandatory grounding. A smaller cable cross-section leads to wiring overheating under load. After the first startup, check the unit for even heating across all sections — by hand (carefully) or, if possible, with a thermal camera, comparing the temperature of the top and bottom of the radiator.
Step 5. Setting the temperature
Set the desired temperature on the control unit. From then on, the thermostat automatically switches the heating element on and off to maintain the set level without any user involvement.
Table: common faults after assembly and their causes
| Symptom | Likely cause | What to do |
|---|---|---|
| Last section is cold | Air pocket in the system | Top up the coolant, release air through the Maevsky valve |
| Radiator heats up slowly | Insufficient heating element wattage for the section volume | Check that the heating element's wattage matches the number of sections |
| Control unit shuts off right after startup | The overheat sensor triggered due to an air pocket or dry running | Check the coolant level, refill the system |
| Leaking from under the heating element gasket | Insufficiently tightened connection or damaged gasket | Tighten the connection, replace the silicone gasket if needed |
Practical experience: what to watch for after a DIY assembly
The most common mistake among first-time builders is not fully removing air from the system during filling. Experienced builders recommend letting the radiator run for 20-30 minutes after the first fill, then checking the sections by touch along their whole length: if there's unevenness, top up the coolant and bleed the air again through the Maevsky valve. The second point that's often underestimated is the choice of coolant. Distilled water is cheaper, but without corrosion inhibitors, the service life of the heating element and the radiator's inner surface can shorten faster than when using a dedicated propylene glycol mix.
Why following electrical safety rules matters
An electric radiator with a heating element is a unit with a rated power of several hundred watts or even kilowatts, connected directly to the household mains right next to water or coolant. An improperly tightened connection, damaged sensor wire insulation, or using an ungrounded outlet significantly raises the risk of a short circuit or electric shock. If you're not confident in your own electrical skills, the installation and connection should be entrusted to a professional, and you should only handle the mechanical assembly yourself.
Regular maintenance of the assembled radiator
- Periodically check the condition of the heating element, wire insulation, and control unit for damage or darkened contacts.
- If the last section becomes colder than the others again over time — top up the coolant, as air may have accumulated again.
- Follow the manufacturer's instructions on the maintenance schedule for your specific control unit model.
A ready-made solution instead of DIY assembly
For those not ready to install a heating element and work with electricity themselves, there's an alternative — ready-made, factory-assembled electric heating radiators with a control unit already built in and factory-tested. If you already have a bimetal radiator and only need a control unit with a heating element for conversion, more details on how such a unit works are covered in the article "Control Unit with a Heating Element for a Radiator: What It's For and Its Advantages".
How many radiator sections you need and how it affects the result
The number of sections in a bimetal radiator determines the volume of coolant in the system and, therefore, the heat capacity of the finished unit. A radiator with more sections retains heat longer after the heating element switches off, which is handy during power outages, but it requires a heating element with enough wattage to warm the entire coolant volume within a reasonable time. A heating element that's too weak for a large number of sections will take a long time to reach operating temperature, while one that's too powerful for a small radiator will tend to switch on and off in short cycles, accelerating wear on the element.
DIY versus factory-made: comparing costs and risks
| Criterion | DIY assembly | Factory electric radiator |
|---|---|---|
| Cost of components | Lower if the radiator is already on hand | Higher per unit, but no extra time investment |
| Guarantee of watertight connections | Responsibility rests with the builder | Factory-tested with a manufacturer's warranty |
| Risk of installation error | Higher without experience | Minimal, the unit is ready to use |
| Flexibility (can repurpose an existing radiator) | Yes | No, you buy a ready-made unit |
When DIY assembly makes sense, and when it's better to buy a ready-made solution
DIY assembly makes sense when you already have a working bimetal radiator (for example, from a decommissioned central heating system) and have basic tool skills and an understanding of electrical safety rules. If you need a working unit for a specific room quickly and without risk, it's smarter to consider a factory-made electric radiator with an already-tested control unit — this is especially relevant for rooms where the heater will run without constant supervision, such as at a cottage in winter.
Choosing a control unit: what to look for
Not all control units offer the same functionality. Basic models have only a mechanical thermostat and a power button, while more advanced ones offer an electronic display with precise readouts of the set and current temperature, a weekly timer for programming different modes at different times of day, and expanded protection — not just against overheating but also against dry running (triggered if there's not enough coolant in the system). For a room without constant supervision, such as a cottage in winter, the extra protection justifies a somewhat higher price for the unit.
Practical watertightness check before continuous operation
After assembly and the first coolant fill, it's recommended not to leave the radiator unattended for a long stretch right away. During the first few hours of operation, periodically inspect all connections — around the heating element, the Maevsky valve, and where the sensor wire exits — for the slightest traces of moisture. Even a minor leak at this stage is easy to fix by tightening the connection, whereas after several weeks of continuous operation, the same leak could lead to a more serious control unit failure.
Using the assembled radiator as part of a heating system
A single assembled electric radiator rarely covers the heating needs of an entire house — more often it's a solution for a single room: a workshop, a cottage during the off-season, or a garage. If you plan to heat several rooms, it's smarter to assemble or buy a separate electric radiator for each room with its own thermostat, rather than trying to size one unit for the whole house — this way each room gets exactly the temperature it needs without wasting electricity on a room that doesn't currently need heat.
Electricity costs of an assembled electric radiator
The electricity consumption of an assembled radiator is determined by the heating element's wattage and the thermostat's operating mode, not by the fact that it's "homemade" — at the same wattage and thermostat quality, a DIY and a factory radiator consume roughly the same amount. A cost difference appears if the DIY unit has worse heat losses due to poor connection insulation or an incorrectly sized heating element relative to the coolant volume, so assembly precision directly affects your future electricity bill.
Common questions during the first startup
After the first startup, a common question is whether it's normal for the radiator to heat unevenly for the first few minutes — this is expected, since heat from the heating element gradually spreads across the sections through coolant convection inside the system. But if the unevenness persists longer than 20-30 minutes of stable operation, it points to an air pocket and requires bleeding the air again through the Maevsky valve.
When to call in a professional instead of assembling it yourself
If you lack experience working with electricity, aren't confident in your own assessment of an old radiator's condition (corrosion, hairline cracks in the sections), or the unit is planned for a room with people present at all times without regular oversight, it's smarter to call in a professional at least for a final check and connection. The cost of such a consultation is usually far lower than the potential consequences of an installation mistake with an electrical appliance.
Checking the condition of an old radiator before conversion
If you're using an existing, previously used bimetal radiator for the assembly, inspect the sections for signs of corrosion, leaks, or mechanical damage to the threads before installing the heating element. A radiator with noticeable wear on its threaded connections is better not used for a unit with an electric heating element — the risk of coolant leaking near a running heating element creates an extra hazard compared to a regular water heating system.
Sources and useful links
- DSTU 7158:2010 "Household electrical appliances. General safety requirements."
- PUE (Electrical Installation Rules) — requirements for connecting household electric heating appliances.
- ECOTEPLO catalog of control units with heating elements for choosing components.
DIY assembly of an electric radiator is a perfectly achievable task with basic skills and care — the main thing is not to rush the coolant-filling stage and always check the reliability of the electrical connections before the first startup.

-
What do you need to assemble an electric radiator yourself?
A bimetal radiator, a heating element of the appropriate wattage, a control unit with a thermostat, coolant (distilled water or propylene glycol), and a basic set of wrenches.
-
What liquid should go into an electric radiator: water or a special coolant?
It's best to use distilled water or a dedicated propylene glycol mix — regular tap water contains salts that accelerate corrosion and scale buildup on the heating element.
-
Why does the last radiator section stay cold?
The most common reason is an air pocket in the system. Top up the coolant and release the air through the Maevsky valve.
-
How long does it take to assemble an electric radiator with a heating element?
With the right tools and basic skills, the process usually takes 1-2 hours, including filling the coolant and checking for even heating.
-
Can you connect the control unit to the mains yourself?
The mechanical assembly can be done yourself, but the mains connection should be entrusted to a professional if you're not confident with electrical work — the unit operates at a relatively high wattage right next to the coolant.
-
What if the control unit shuts off right after startup?
This is most often the overheat sensor triggering due to an air pocket or insufficient coolant level. Check the system's fill level and bleed the air again.
-
What heating element wattage is needed for a 10-section radiator?
Wattage is sized to the coolant volume of your specific radiator model — check the exact figures with the manufacturer of the heating element or control unit for your radiator model.
-
Do you need to top up the coolant over time?
Yes, it's recommended to periodically check the level and top up the coolant, especially if you notice the top or end sections heating less well.
-
How does a factory-made electric radiator differ from a DIY one?
A factory-made electric radiator has a control unit that's been tested and certified at the factory, plus a watertight connection, while a DIY assembly requires personal quality control at every step of installation.
-
Is it safe to leave a DIY electric radiator unattended?
With a working thermostat and overheat sensor from a reputable manufacturer, the risk is minimal, but after assembly you should monitor the unit's operation for a while before leaving it unattended for long periods.